Sunday, May 29, 2011

Minecraft Lag Fixes

Minecraft, despite it's "oldschool 16-bit" appearance, actually requires a somewhat fancy computer to run well, or on the higher settings. Also, to connect to multiplayer you need a decent connection. This tutorial will show you how to resolve these problems.

Firstly I will go over actual game lag, and easy ways to fix it. As in frames dropping and things of that nature. The first thing you can do to combat the problem is turn all the higher video settings down by hitting Esc--Video Settings-- To turning down sight distance, fancy to fast, no head-bobbing, smooth lighting off, and don't limit frame rate. Now this is the obvious fix you've more than likely done before, so secondly you can restart your computer if it was at one point faster than it is now. This will clear the RAM and allow you to load things faster upon it starting up again.

The third step in clearing up lag is a tad more technical, and comes with associated risks. Load up Minecraft, enter single-player and pause. Now open Task Manager by hitting control+alt+delete at the same time. Once in, select the "processes" tab. If you have opened Minecraft you should see a "Java.exe" in the list of ongoing processes. Right click the process, and another list should appear. Scroll down to "Set Priority" and select high or above normal(see below). Now some people have problems with their computers overheating or fans spinning out of control, and this could be a solution to that if you would like to actually set it lower.

Note: adjusting this, or anything else could cause serious harm to your computer, but more than likely will not do anything but speed up Minecraft.

Lastly there is connection issues. This information isn't helpful for only Minecraft, but a myriad of other online games. First things first either go to speedtest.net on your PC or if you'd like to test your connection from your iDevice, download Speedtest from the app store. Speedtest is an internet speed test, and once there hit begin. If the ping is above roughly 150, with a download of below 5, and an upload of below .5, you may just have a bad internet provider. Remember, if you are the one wanting to host a server you'll need a good connection and an especially good upload speed. So if you clock in with a bad test, try restarting your router. When it comes on it will clear old processes and start fresh. After this make sure no one is downloading or uploading unnecessarily big files to ensure speed is maintained.

Next, I will go over connecting to friend's run-from-home servers. If you don't have it and connect through it already, I'd recommend looking into Hamachi. Hamachi basically makes the computers have the ability to exchange information faster, resulting in faster load times and an improved experience overall. If this doesn't help and your connection is good, make sure the host has a good connection. If the host has a terrible connection ask him to reset his router, or consider just moving server location altogether. Note: this doesn't work on servers being housed in a server farm on the other side of the continent.

If none of this seems to help I'd recommend looking into buying either a.) A new router, preferably a Linksys, or b.) Internet from a new provider. Just a heads up, most AT&T packages are rip-offs with limited usage, Grande throttles, Time Warner Cable overcharges, and you will have to find an alternative for your local area without me sadly, but the above is my opinion on IPs. On the subject of upgrading, if the lag doesn't fix itself look into upgrading your graphics card, your RAM, or your processor. Be sure to research before buying though!

Cheers to a faster Minecraft experience, and as always, happy mining! If you have any problems with these suggestions or would like to add your own, feel free to drop a question in the question box.

Monday, February 14, 2011

Spelunking Tips

Spelunking, as defined by Professor Minecraft himself, is the exploring of caves. But, without the proper tips you'll be doomed for eternity stuck in a corner screaming like a little girl every time a creeper pops it's head around a corner. First I'll be going over required equipment, and why you need it, then tips for the actual exploring.

-Firstly, you need a bucket of water. We all saw just how angry the Walrus got without his bucket..(see below). You'll need a bucket if you mine into a lava lake on accident. You'll need a bucket if you wish to collect obsidian. You'll need a bucket if you wish to take lava back to your base. Basically, no matter what, you need a bucket.
-Torches, and plenty of them. This should go without saying, but at bare minimum you need a full stack.
-Stone picks for exploring, trying to find a cave, steel when your down low looking for diamonds. This means only when near the core use steel.
-Lumber. Lumber. Lumber. If you need to make a makeshift forward base
Bucket Theft

The most important thing to do is insure you can navigate the cave effectively. Included in this is not getting lost. So, developing habits would be a great way to start this. Most will be personal, but there is a few that can be universally helpful. Firstly, when first entering an area, try to put all of your torches on the left side of a cave. So, you know you're going deeper in the cave when the torches are on your left, and you know you're exiting when you have torches on the right. Secondly, bring signs or some kind of block for marking dead ends. It'll aid you in not traversing the same part of the cave several times. For example, dirt could mean dead end, cobblestone means loop, or whatever system works for you. Alternatively, and much more easily, simply make a sign and name them what lies ahead.
Now, what your goal is while your down here is to collect resources, correct? But, there's some key things to ensure you get the maximum amount of resources while in the cave. The first thing to practice is always digging around an area when you find one iron. Iron spawns in clusters of 2-3 veins, which means after you find one, it's highly likely you can find another 3 or 4 nearby with little effort. Secondly, try to establish a makeshift base near the front of your cave. Bring lumber along and other essentials(see needed items list), to ensure you don't have to back up top to restock. Keep your cobblestone, gravel, and other non essentials in the chest here. Or, you can make more picks by crafting a worker's bench.

Wednesday, February 9, 2011

Community- Water and mining

I would like to submit some short tutorials in which i or someone else may upload photos later.

How to: Infinite Water
Some people love to build fancy inventions, with or without the InvEdit, or Inventory Editor. Either way, when you get so hyped up on water stuff, or other things, it can become a pain to keep saving and putting more items in and re-entering. Well, If you are one of those people, do i have the thing for you!
Infinite water: First dig a hole 1 block deep with it being 2×2. Next, place two buckets of water in the diagonal corners. Finally, Magic occurs. Have fun!

Quick Mineshaft Travel Part 1: Water Ladder
Ladders may help climbs increase in speed, but in deep deep tunnels they are slow and a bit under-efficient. If you want a faster way to climb out of holes, here is what you need:
Supplies: A Bucket of water, shovel, pickaxe, torches to place on the way down, and as many ladders as needed; Note: for part two of this, other supplies are needed).
1: First, you must know your directions in the game. Here is the easiest way. Look at a block of dirt. One edge will have one gray spot touching it, while the others don’t. That direction is west. Now, this ladder should only work facing west or south, but it may work otherwise(i still wouldnt take my chances).

[Editor's note: An alternative way of finding direction is finding where the sun sets and rises. It rises in the East, and sets in the West]

2: Dig a hole 1 block deep by 1×5. Then, in that hole, go to the North/East end, and build block deeper by 3 blocks of the 5. At the edge where the 2 ledge you created from digging the 3 in the 5 meets the 3 hole, put a ladder on the wall by it.
3:Then, get out of the hole, and place a bucket of water ,facing the ladder, on the 2 ledge. The ladder prevents the water from falling into the rest of the hole.
4: Then, dig down 2 more blocks in the three hole. Place a ladder below the first, skipping one ladder in between. Dig into the wall on the side of the ladder(ONLY next to the ladder not the whole wall) 2 blocks in and above the second block you dug out, 1 block up. Water will fall in the hole, and be stopped by the ladder again.
5: Repeat step 4 until satisfied with depth of hole.
6: Face the ladders on the wall and hit up. You travel very slowly. Now, face the water next to the ladders and hit up. Express lane baby!

Quick Mineshaft Travel Part 2: The Descent
Now that you can travel very quickly up Your Mineshaft, taking the ladder down is a drag. That is why the ladder hole was 3 not 1 in the end. Ingenuity. For this waterbreak fallshaft, you will need:
Supplies: 2 signs per waterbreak(one waterbreak about every 5 blocks about until the end), still water(found in inventory editor; not sure if buckets of water work), and one staircase, some glass(if using invedit go with 64 to be safe)
1: First, go the the wall at the end of the hole. If starting from the bottom, (I highly recommend to start as you build) look up three blocks. There is where you will place your water, but first, MAKE SURE THIS HOLE IS ONLY 1 BLOCK WIDE. Then, place a sign one under the third block up, and one to the side of it. Acting sortof as the ladder, this contains the water to prevent any spillage, or unnecessary flooding.
2: Place the water on the third block. It should be a suspended block(Look from under it is so awesome). This is what we call a waterbreak.
3: Repeat this process; Steps 1 + 2, every five or so blocks above the first one.
Optional:
4: Go to the Surface of your tunnel. Create a staircase a block next to the top of the end of thr hole(where it is convenient)
5: Build a glass box around the staircase, making sure there is a 2 block gap for walking above the staircase and enclosing the hole with the waterbreaks.
6: Add any finishing touches like an enterance sign by the staircase.
7: Walk up the stairs, and walk into the hole with the waterbreaks. After this, don’t press any directional buttons until full descent so you don’t become unaligned with the waterbreaks. You will fall to the bottom, but because of the waterbreaks slowing down a little, you won’t die, or lose any hearts when you hit the bottom.

Submitted by Grady W.

[editor's note: I must commend this person on typing this out on an iPod/iPhone. I have only edited for grammatical errors, and have not added any extra content.]

Tuesday, February 8, 2011

On the Search for Diamonds

The most prized possession in all of Minecraft, diamonds! You can make extremely effective and durable picks, axes, swords, armors and more. But sadly, there are extremely hidden, far below the Earth. Believe it or not, there are in fact techniques one can use to find them.

This is an extremely helpful tutorial on finding diamonds.


And here is the diamond finding theme song.


If you don't fancy videos, and would prefer a typed tutorial, here it goes. First things first, find out where level 64 is. You spawn on 64, and consider 64 your sea level. Now, diamonds spawn on level 1-16. But, there is much less diamonds near level 10 and down, and bedrock from level 1-5. So level 12 is your best bet.

overview mcraft
So, the recommended technique would be to arrive at your intended level you'll be mining. Once, there, make a tunnel jetting out of it and set up a supply post with picks and anything else you'll need. Something you'll want to take note of here, the world is infinite, your time is not. So don't worry about using stone picks to clear stone. Just use iron the entire time, as you'll find plenty more to replenish your supply. Travel in straight lines will mining, then return back to the main tunnel when needing a resupply/straying to far away. Just follow these tips, and you'll have diamonds in no time!
Enjoy!
..or just use invEdit

Wednesday, January 26, 2011

Request Articles

The suggestion box doubles as a request box. If you want insight on a certain aspect of the game or how to do a certain task, feel free to request it in the suggestion box.

Saturday, January 8, 2011

Skin and Texture Modification

Notch, the lead developer of Minecraft, is open to people modding his game. Some types of modding require painful coding and rebuilding of the game. But the two things fully supported are skin and texture modification. Skin being the way the in-game avatar looks, and texture being the way each block and texture looks.
Skin Modification
http://minecraft.decx.org/
The above link is a Minecraft skin generator. Deck it out, choose from face, outfit, accessories, hair etc. Once you're ready, hit generate new skin file and save it to your desktop. Now go to minecraft.net and hit the profile button. Once there, find the file and upload it. You're finished product should be there, hopping around looking a tad too joyful.


Texture Packs
http://www.minecraftforum.net/viewforum.php?f=1021
http://www.worldofminecraft.com/Texture_Packs?page=1
Both of the above links are sites that offer texture packs. Be careful, there is a chance they may contain a virus. But once you have the file, load up the game menu. Now click the "Mods and Textures Pack" button. Upload the file there, and be filled with wonder at the awesome that is your new texture.

How To: Avalanche Mechanics

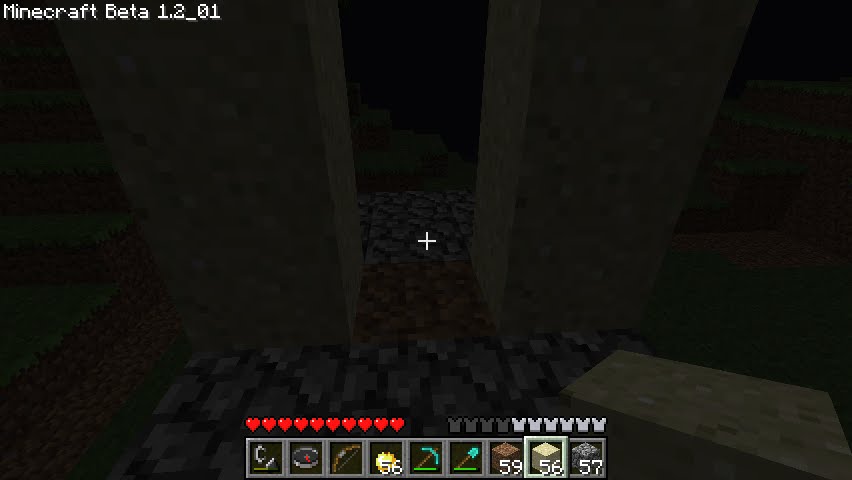
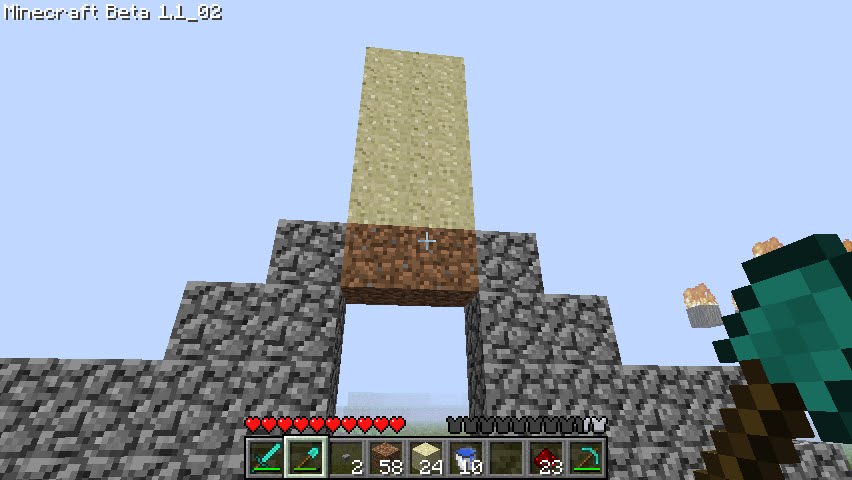
Avalanche mechanics is the term used to describe the physics of sand and gravel. Both can be supported by stable objects such as dirt, stone etc, but objects like torches and ladders work as well. Normally it is used as a gate, or a part of a trap, due to the fact it "closes" that area after the stable object is destroyed. Below is a basic example, and a basic setup.
Before

Note the dirt, used to quickly block off access.

Before

After

If you would like to deviate from an avalanche being used to only block off access to an area, put some kind of danger in the middle of the gate. So either lava, landmines or cacti. As soon as the mob nears, block off the entrance and they'll fall prey to your trap.

There is one thing that may be difficult, the range factor. You have to be within several blocks of the trap for it to be effective, which may be a huge problem when dealing with skeletons. With the below variation, though, you can do it from range.

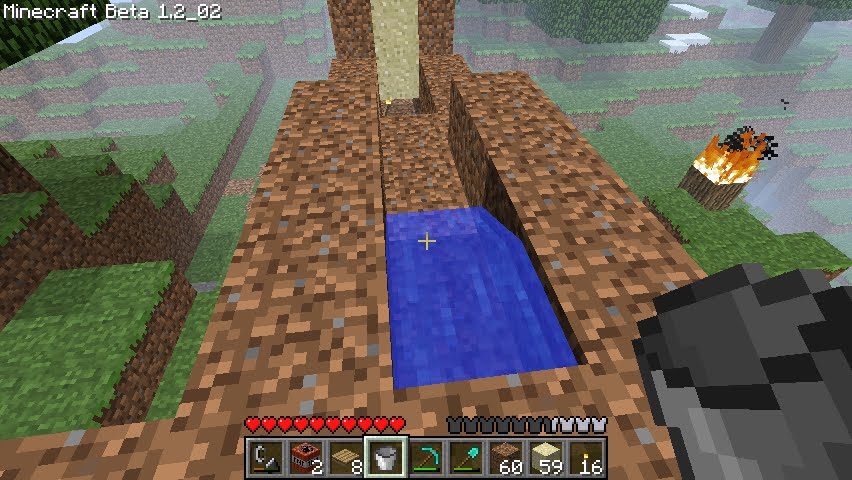
So torches have two unique properties. 1.) They can hold up sand and gravel. And 2.) They break when touched by water. So simply have a torch holding up several blocks of sand, an aisle where the water can be poured(note, it has to go from a higher elevation to a lower one to achieve max range) then an outlet so that the torch will break and the way close.
Gate: Open

Waterway: Filled and beginning to flow

Gate: Closed and secure

So, use the above methods to fortify your base and protect your pixelated goodness.